Delivery Menu Photos: The Guide That Lifts Your CTR by 40%
Introduction
On the Rappi, PedidosYa, or Uber Eats grid, your photo is working before you are. Customers decide in less than two seconds whether to click through to your menu or keep scrolling. If the photo does not convince them, it does not matter how good the product is — it never reaches the cart.
The difference between a typical restaurant photo and one genuinely made for delivery is measured in CTR (click-through rate) and, ultimately, in orders. In the accounts we audit, optimising the photo set lifts CTR between 20% and 40%, translating directly into more orders without paying a single extra penny in commission.
This guide is the complete manual for moving beyond amateur shots and building a visual system that works as a 24/7 salesperson inside the apps. You do not need a professional camera or a studio. You need judgement, a repeatable routine, and attention to 10 specific details.
Why Photos Are the Most Underestimated Lever in Delivery
Most restaurants invest in having a great product, meeting their preparation times, and responding to reviews. But in delivery there is an asymmetry that few see: the customer never tastes before buying. The entire purchase decision passes through the photo, the description, and the price — and the photo carries more weight than the other two combined.
Three things that come up in every serious audit:
The app grid is a visual decision. Customers scan, they do not read. If your photo does not compete, there is no second chance.
The algorithm rewards CTR. More clicks per impression = better grid position = more impressions = a virtuous cycle. A bad photo breaks you out of that cycle.
The customer who enters your menu keeps looking at photos. Every item is a micro purchase decision. Five items without a photo kill the average order value.
And yet, in AI audits we run, more than 60% of menus still have photos taken on a phone in poor light, with no consistent style, or — worse — generic stock images.
What Makes a Photo That Sells on Delivery
It is not the camera. It is not the Instagram filter. A photo that sells on delivery meets five conditions simultaneously:
Identifies the product in under one second. If the customer has to think about what they are looking at, you have already lost them.
Creates immediate appetite. Ingredient colour, texture, visible steam when relevant.
Maintains a consistent style across the rest of the menu: same angle, same background, same lighting treatment.
Is legible as a thumbnail. The app displays it at 300x300 px. If the dish is lost in the frame, it does not work.
Competes against the photos of the restaurant next to you. That is the only real benchmark: open the grid in your area and compare.
Meeting all five does not require a studio. It requires judgement and a repeatable routine.
Minimum Setup for Photographing Your Menu
You do not need expensive gear. What you do need:
Camera.
A decent smartphone (iPhone 11+ or Android equivalent) is enough. The light matters far more than the sensor.
Light.
Natural light near a window on a cloudy morning or afternoon (no direct sun). Direct sunlight creates harsh shadows that do not flatter food. If you shoot at night or in a windowless space, an LED light box for USD 30–50 replaces natural light perfectly.
Background.
One consistent surface throughout. Options that work:
Light wood (chopping board, warm tone).
White marble (premium, neutral, works well for burgers and desserts).
Dark slate (high-end feel, strong contrast against light-coloured ingredients).
Kraft paper (informal, ideal for street food and wraps).
What does not work: patterned tablecloths, a table with crumbs, backgrounds showing the restaurant interior with distracting elements.
Tripod or stable mount.
To keep the angle consistent between shots. A USD 20 tripod is sufficient.
Plates and tableware.
Use the same tableware throughout the entire menu. If you alternate between white plates, black plates, and wooden boards at random, the menu looks unprofessional even if each individual photo is good.
The 10 Rules for Photos That Increase CTR
1. One Hero Photo Per Product, Not Five
The grid shows only one image: the first. The others only appear when a customer has entered your menu and opened a specific item. Optimise the hero photo to the maximum; the rest serve as support.
2. Match the Angle to the Product
There are three classic angles in food photography, and each works best for a different type of dish:
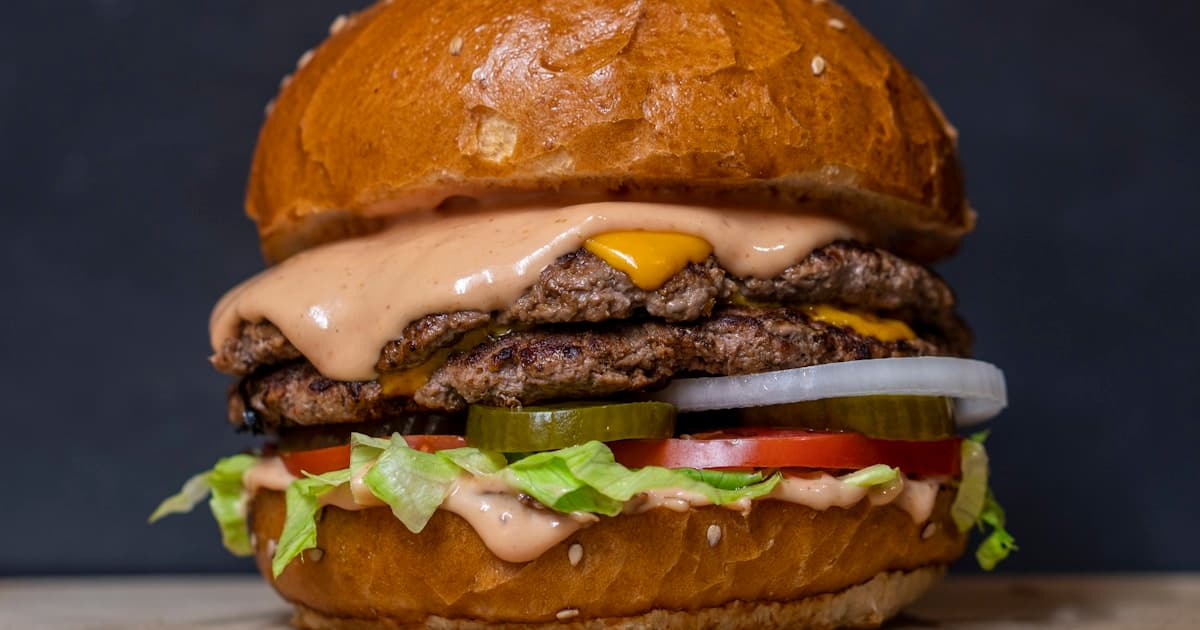
45° (three-quarters): works for burgers, sandwiches, pizzas, tall dishes. Shows layers and volume.
90° (top-down / overhead): works for bowls, salads, pasta, flat dishes. Shows composition.
0° (side-on): works for boxed combos, layered bread, desserts in glasses. Shows height and stacking.
Do not use 45° for a salad or top-down for a burger. That is the most common mistake.
3. Tight Framing, Not Wide
The app displays the photo cropped. If your product fills only 30% of the frame, it looks tiny as a thumbnail. Fill the frame: your product should occupy between 60% and 80% of the image.
4. One Clear Focal Point
One photo, one protagonist. If there are three elements in the dish, one should be the clear star and the others should serve as visual support. If all three compete for attention, the eye drifts past.
5. Visual Consistency Across the Entire Menu
Same angle within each category, same background, same lighting treatment. When a customer opens your menu, their brain should feel they are looking at one coherent restaurant, not a marketplace of unrelated suppliers.
6. Colour and Contrast
Cooked food loses colour and vibrancy. Before the photo:
Brush buns and burgers with a little oil (shine).
Mist salads with water (freshness).
Cut into ingredients to reveal the interior (sliced tomato, melting cheese dripping, avocado cut open).
This is not deception — it is food styling. What is deception: showing a double-size portion or ingredients that are not in the actual product. That generates negative reviews, which lower your rating and suppress your ranking.
7. Minimum Resolution: 1200x900 px
Apps rescale images. Uploading a 600x400 image looks blurry on a retina screen. Always upload at least 1200x900 px, ideally 1600x1200. Format: JPG, maximum file size 1 MB per image.
8. No Text Overlaid on the Photo
No "Monday deal" or "free delivery" overlaid on the image. Some apps reject the image outright; others allow it but reduce its visibility. The promotion goes in the description, not the photo.
9. No Watermarks or Logos
Same logic: they clutter the image, reduce the perceived professionalism, and compete with the product for attention. Your branding comes from the overall consistency of the menu, not a logo stamped on every photo.
10. Real A/B Testing Every 4–6 Weeks
Upload a photo variant for your top three best-selling products and measure orders over 2–3 weeks. If the new version performs better, keep it. If not, revert. Food photography is not static — what works in March may not work in September.
How Many Photos Do You Need to Start?
A minimum viable set for a typical delivery menu:
If you cannot do everything in one session, prioritise: top 5 products first, then combos, then everything else.
👉 Request your free Growth Delivery App audit and find out which photos in your menu are losing clicks.
Common Mistakes That Kill CTR
Photo of the dish taken in the restaurant, with glasses, napkins, and tablecloth visible. It looks "lively" but distracts the eye and reduces focus on the product.
Photos taken with direct flash. Flattens colours and kills volume. If there is no natural light, buy the LED light box.
Same dish repeated across multiple variants. Uploading the same burger four times with different toppings makes customers think they are all the same product. Use clearly distinct variants.
Mixed visual styles. A professional photo next to a phone snapshot ruins the entire set. Consistent mediocrity beats random quality.
Photo that is too dark or too bright. Customers associate it with unappetising food. Adjust brightness and contrast before uploading.
Not updating photos for years. If the product has changed (portion size, presentation, ingredients), the old photo generates negative reviews for "not looking like the picture."
Quick Editing: 4 Adjustments That Move the Needle
You do not need Photoshop. Snapseed (free, mobile) or Lightroom Mobile are more than enough. Four adjustments:
Brightness +10 to +15 — brightens without overexposing.
Contrast +5 to +10 — defines the silhouette of the product.
Saturation +10 to +20 — ingredient colours become more appetising (do not overdo it: if the lettuce looks fluorescent, you have gone too far).
Sharpness / sharpening +20 — reinforces texture.
Apply the same preset to all menu photos to guarantee visual consistency.
When to Hire a Professional Food Photographer
If your monthly delivery revenue exceeds USD 5,000 and your menu is stable, hiring a food photographer once a year is ROI-positive. Typical cost in LATAM: USD 200–600 for a session covering 20–30 dishes.
If you are just starting out or your menu changes frequently, do it yourself with the minimum setup and save the professional investment for when your menu has stabilised and your key products have been validated.
Frequently Asked Questions (FAQ)
Can I use stock images for my delivery menu?
No. Apps detect them and penalise them in rankings, and customers notice when the product they receive does not look like the image. It generates negative reviews and cancelled orders.
How long does it take to see the effect of updating menu photos?
Between 7 and 14 days to see movement in CTR. For sustained movement in ranking and orders, 21 to 30 days, because the algorithm needs to accumulate new conversion data.
What is the best app for editing food photos on a phone?
Snapseed (Google, free) or Lightroom Mobile (Adobe, freemium). Both allow you to save a preset and apply it across all your menu photos to maintain visual consistency.
Do I need different photos for Rappi, PedidosYa, and Uber Eats?
No. The same well-executed photo works across all three. What may differ is the format: some apps prefer 1:1 square, others 4:3. Always upload at maximum resolution and let the app crop to its requirements.
Can AI evaluate my menu photos?
Yes. A well-trained AI compares your photos against the top 10 in your category and zone, and tells you exactly which ones are performing below average and why (framing, colour, contrast, visual consistency). That is part of the Growth Delivery App audit.
Conclusion
Photos are not "aesthetics" — they are conversion. They are the most cost-effective investment a restaurant can make in delivery because they lift CTR without paying extra commission, without lowering prices, and without renegotiating anything with the platform.
Start this week with the minimum viable set and apply the 10 rules. Within 30 days, your CTR rises and your ranking improves on its own. And if you do not have time to evaluate every photo in your menu with a critical eye, run an AI audit: in 5 minutes it will flag exactly which photos are bleeding clicks.
👉 [Audit your restaurant for free at Growth Delivery App](https://growthdeliveryapp.com/demo)